|
|
|
Phone 810-762-5735 |
E-mail SettingsThis section describes how to configure either Netscape Navigator 3 or Microsoft Outlook Express / Outlook for accessing a Fine Line Design e-mail account. There are a lot of images on this page so it make take a while to download. Set up for Microsoft Mail and most other email programs is very similar. The screen shots may look different, but the information you need will be the same. Please contact us if you wish to set up a "web mail" account that you can use from any browser. This is a good option if you are traveling without your computer. It is not a good solution as a permanent email client however. Note on E-mail Aliases: Each Fine Line Design e-mail account can contain up to 5 e-mail aliases. However, all 5 of the e-mail aliases all pipe into the same e-mail account. You only need to setup one e-mail account as described below, and you will be able to retrieve all e-mail from any of the 5 e-mail aliases. Only if you have paid an additional monthly fee for additional e-mail accounts will you have to setup more than one account in Netscape or Microsoft Outlook. IMPORTANT NOTE: If you are using your ISP (Earthlink, MSN, Comcast, SBC, ATT, etc.) to SEND mail, use the settings they provide for all OUTGOING SMTP mail server settings. Note that if you have AOL as your ISP, they are not "Outlook friendly" they would prefer that you use their proprietary email service. Contact us and we can have your site email forwarded to your AOL account. Or you may use the settings below. Outlook 2003 and higher (this is the most universal set up procedure. If you are having trouble with another method, try following these instructions) Netscape Navigator 3
How to Setup Outlook 2000Please note: If you have already setup SMTP in another application such as Eudora or Netscape you can import the mail settings from another client by going to File --> Import --> Internet Mail Account Settings. You may find this may save you the hassle.1. Open Outlook and click on Tools from the menu bar. Select Services from the drop down menu. Note: If you do not have a 'Services' menu to select please follow the Outlook Express instructions. 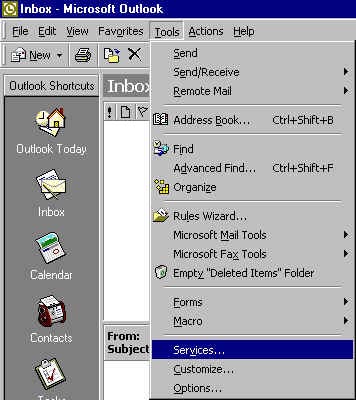 2. Click on the Add Button and select Internet Email then press okay. 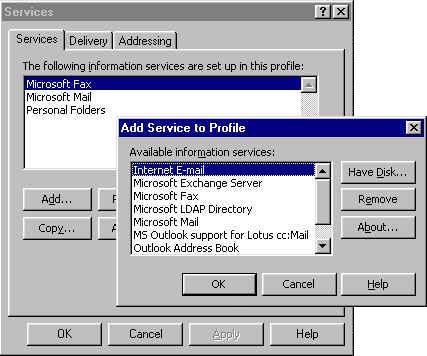 3. Enter your details into the following fields & click okay 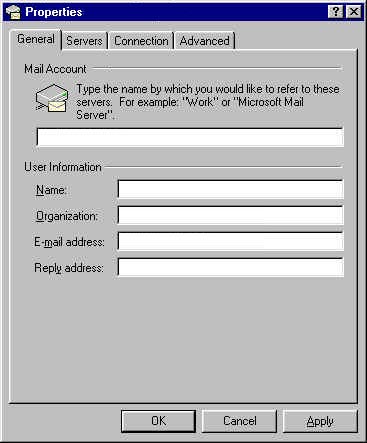 4. Now click on the Servers tab and enter mail.server101.com into both the outgoing and incoming mail server fields. Then enter your Mailbox ID (abcd0001) or your User ID for the master POP with the mailbox password. Make sure Secure password authentication is unticked. Go to the My server requires authentication, check the box and click Settings. 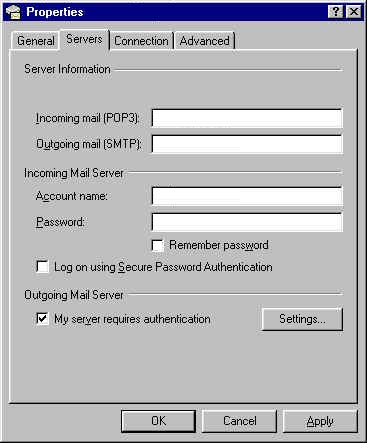 8. Check the Log on using radio button and enter your network username eg. yourdomain@yourdomain.com and the network password in the Account Name fields. Username: - yourdomain@yourdomain.com [network username] Password: - Password for your mailserver account. Note this is not your incoming email account Username or Password. Contact Fine Line Design to request a mailserver network username and password. 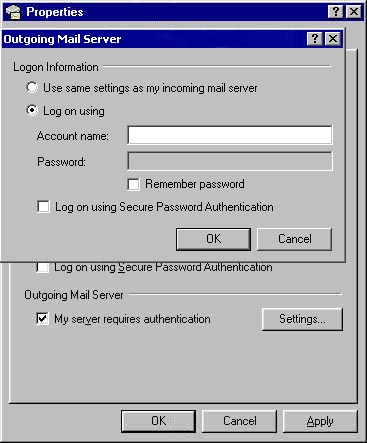
You have now completed your mail configuration.
How to Setup Outlook ExpressPlease note: If you have already setup SMTP in another application such as Eudora or Netscape you can import the mail settings from another client by going to File --> Import --> Mail Account Settings. You may find this may save you the hassle.1. Open Outlook Express and click on Tools from the menu bar. Select Accounts from the drop down menu.  2. Click on the Add Button and select Mail.  3. Enter your name and Click the Next button at the bottom of the Screen.  4. Select I already have... and enter the full email address that you would like people to send email to. Once entered click the Next Button  5. Select POP3 from the select box and enter mail.server101.com in both fields and click next.  6. For the last step of the wizard enter the account name, eg. your Mailbox ID (abcd001) or User ID for the master POP account, and make sure SPA is unticked.  7. Once you have finished the wizard go to the Tools drop down menu and click on Accounts and press the Properties button. Go to the My server requires authentication, check the box and click Settings.  8. Check the Log on using radio button Username: - yourdomain@yourdomain.com [network username] Password: - Password for your mailserver account. Note this is not your incoming email account Username or Password. Contact Fine Line Design to request a mailserver network username and password. Make sure Secure password authentication is unticked.
Setting up Microsoft Outlook 2003Outlook 2003 provides an integrated solution for managing and organizing e-mail messages, schedules, tasks, notes, contacts, and other information. Outlook 2003 delivers innovations you can use to manage your communications, organize your work, and work better with others—all from one place.
1. Open Outlook 2003 and click on the 'Tools'
drop down menu. 2. Click on 'E-mail Accounts'. 3. Check the 'Add a new e-mail account' radio
button and click 'Next >'. 4. Check the 'POP3' radio button and click
'Next >'. 5. Enter the configuration details for this
account. Make sure 'Secure Password Authentication (SPA)' is unticked. Whether
save password is checked or not is up to you. If you are using your ISP for outgoing mailserver, skip to step 9. 6.
(To use our SMTP server only, not your ISP) Click on the 'More Settings' Button to bring
up a new configuration dialog. 7. Click the 'My outgoing server requires
authentication' check box. 8. Check the 'Log on using' radio button and
enter your outgoing mailserver authentication details. 9. Click the 'Next >' button. 10. Click the 'Finish' button to close the
wizard.
|
|